One of my daughter’s most beloved toys is her IKEA DUKTIG mini-kitchen. It was a gift from the grandparents, and it’s one that she’s never tired of. Iris is a lot like her mommy, and baking and cooking wonderful savory foods are some of the many things they love to do.
The only problem with her mini kitchen is that it lacked a few fundamental similarities to Mommy’s big kitchen. For instance, her little oven door opened the wrong way. And there was no light in the oven that came on when she opened the door. This was just no good. Time to get modding.
Part 1: Fix The Doors
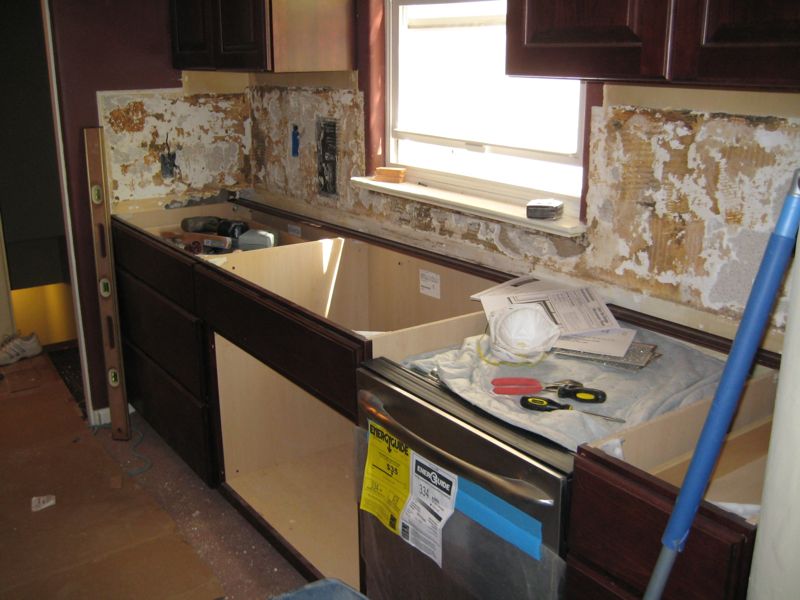
The doors on this mini kitchen are goofy. The door on the right is supposed to be a storage cabinet. It’s handle is located at the top, yet it is hinged on the right, such that it opens left to right, much like a door would. Yet, why have the handle positioned at the top? This is such a subtle user interface issue — even my 2 year old toddler somehow subconsciously understood that with a door handle at the top, the door should intuitively swing down, not right! The same goes for the left door, which is supposed to simulate the oven. It too is hinged on the left, but the handle is again located at the top. Here is an example image of the kitchen with open doors:

IKEA’s design choices are just puzzling to me. I suppose you could chalk them up a language barrier, they being Swedish and all. For all I know, the Swedes’ oven doors open in such bizarre, counter-intuitive ways. But that’s not how Americans do it. Time for an update.
So the door on the right was actually easiest to correct. My wife came up with the solution: simply rotate the door counterclockwise 90 degrees. It’s a brilliant solution, and fortunately the door’s dimensions are square! Re-hinging the door proved easy.
The left oven door was a bit more challenging. This door should be hinged on the bottom, and its handle is correctly positioned. To hinge it like this, the existing hinges had to be scrapped. I made a trip to the hardware store to find an adequate hinge that was far enough recessed such that the door would properly open.

Sadly, I only found one of these, so it had to be positioned centrally. As a result, the door was a bit wobbly, but it worked.
And within about 45 seconds, Iris took to the new and improved door hinging just fine!
Part 2: Add a Light
The next mod was to add a light to the oven chamber. Our good friend Melissa added a light to her kid’s mini kitchen. I thought this was such a great idea, and so obvious, that I wondered why Duktig hadn’t included it. Not to worry, I have a soldering iron for just such an occasion.
I happened to have all the requisite parts for this project: small DC incandescent light bulbs, batteries, hook-up wire, and limit switch, and hot glue. The circuit was so basic, I could see it in my head. The hardest part was to glue all the wire into place in an inconspicuous way such that a precocious 2 year old wouldn’t be tempted to yank them all out!
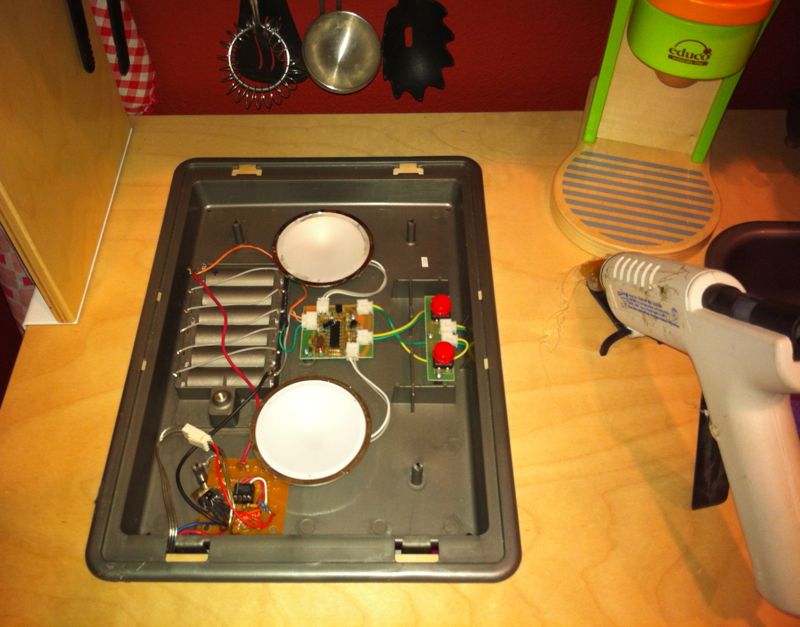
The stroke of ingenuity that hit me was the power source. When I examined the little stove top unit, I realized that this had several AA batteries already. Therefore, it would be easiest to just steal juice from this thing for my lights.

I simply soldered some lead wires to the positive and negative terminals of the battery compartment, and dremmeled out a slot so that my little cable could snake out.

Next up was to wire up the limit switch, which also served as my harnessing point.

Finally, it was time to hot glue the harness into the inside of the oven.

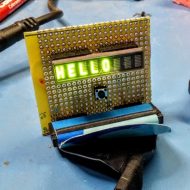
Here are the lights glued into place. You can see them illuminated:

It turned out pretty well.

Most importantly, Iris seems to really love it.

Full project gallery:


Wow, dear, you really are amazing. Thanks for making Iris’s kitchen the best in town. 🙂
Wow- that’s a really neat project! I hope Chef Iris thanked her Daddy! (unless we’re giving credit for this one to the IKEA elves…) She does look happy in the last picture!
Heck no, IKEA gets enough credit for all our home decor. I’m taking the credit for this one.