
I bought a replacement rear view mirror for my 2003 Toyota Matrix. Why? Because the factory mirror is… well, boring.
As with all boring mirrors, you have to manually flip them up when there’s bad headlight glare from cars behind you at night. And there’s no built-in compass!
So I got a used eBay special. It’s a Gentex 170 auto-dimming mirror with integrated digital compass. Pretty sweet idea. The mirror dims by energizing a sheet of LCD (liquid crystal display) material behind the mirror when light shines into the photo sensors of the mirror. Thus, the mirror gets darker in high light conditions.
Testing my Gentex mirror produced some non-intuitive results, however. For instance, I ran a test where I covered up its photo sensor and then removed it. It seemed to work backwards, dimming when I removed my hand. This is actually normal behavior for the photo sensor. My hand over the sensor represents a low light level. The sensor circuit calibrates to that level. Removal of my hand floods the sensor with more light and thus interprets this as a pair of headlights in my mirror: dim the glass.
The compass is an added bonus. There’s a separate module at its mounting base that contains the electronics for the compass. And given how badly I get lost, it’s a shame that I didn’t install one of these mirrors a very long time ago!
On with the install…
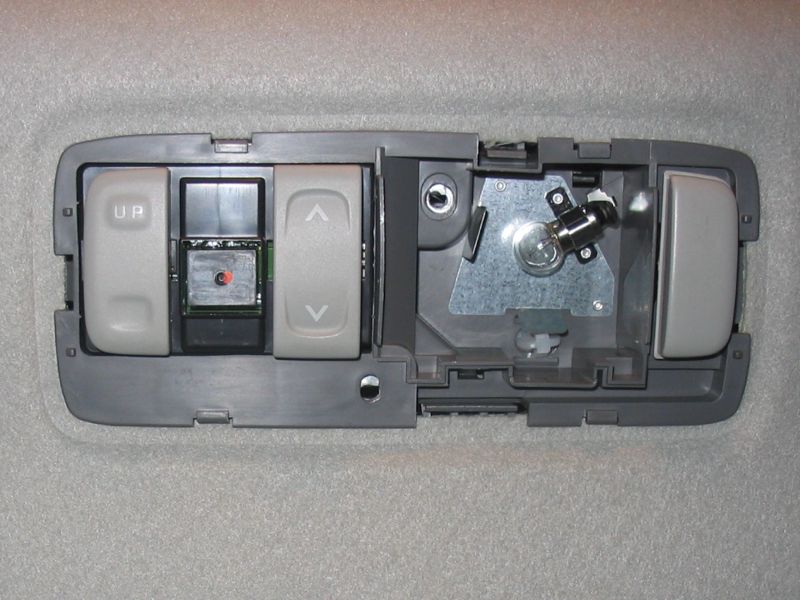
I planed to steal power from my sunroof/moonroof electrical system, which was very close to the mirror. Here is the sunroof switch assembly without its cover plate.
There are a couple screws anchoring the switch assembly. Holding it in place are a couple large plastic retaining clips. I used two regular screw drivers to pry the assembly down.

With the switch assembly out, I could get a good look at the power connector I’d need to splice into. Sometimes these automotive connectors can be difficult to unplug. Locate the little plastic locking tab and give it a really good squeeze and pull hard. The many terminals are crimped very hard onto the wire, so the force you exert on pulling the cable won’t rip any wires from their terminals. Plus, the force is distributed between all the wires, so that’s unlikely to happen anyway.

The cable that came with the mirror was way too short. Rather than mess with extending the cable with butt splices, I preferred to make a new longer cable. Besides, Gentex chose bizarre colors for power (Purple/Orange = +12V, Purple/Black = Reverse ???)

The crimp pins were easy enough to remove. I just clipped them out of the old wire and reused the pins on my own longer wire.

I soldered the old crimp pins onto my new wire to make the best possible electrical interface. I also chose the more appropriate red and black for +12V and Ground, respectively. I don’t know what Gentex was thinking with their wire color choice!

Here is the mirror’s plastic cable shroud. It nicely conceals the cable between the mirror and the ceiling where it then is wired into the car’s electrical system. Notice the length. This mirror was pulled out of a Chevy Suburban, so the dimensions were obviously different than my little Matrix! I’d need to cut this plastic shroud down to size.

I used a Dremel tool to cut the shroud down to size for my windshield. Then I mounted my Dremel to a special press so that I could slowly “carve” the end portion such that it fit perfectly up against my upholstered ceiling (see red circle).

Removing the old mirror is easy; with only one screw to remove, simply slide it upward and off the mirror mount (which is fixed into the windshield). Installing the Gentex was kind of difficult, as there’s no mounting hardware (screws or such). Instead, it just friction locks over top of the mount. And you have to push really hard. I was worried that I’d snap off my window mount, it felt like I was pushing that hard. But eventually, it just sort of, “ga-thunk”, snapped into place.
So now was time to mount the mirror onto the standard mount. The new electrical cable was connected to the mirror and fed through the modified shroud.

I had to punch a small hole through the soft ceiling fiber board to get my cable into the sunroof compartment. This took quite a bit of time, as the fiber board is very dense, so it’s hard to cut through. I used a small exacto knife and carefully cut out a notch. Be careful on the carpet, as it has a tendency to sort of tear and fray.
I put my hole right where the carpeting ceiling meets the glass. That way, the little plastic tube stays flush against the glass. I didn’t actually glue or affix that tube to the glass. It stays flush on its own.
Then, I fished the wire through.
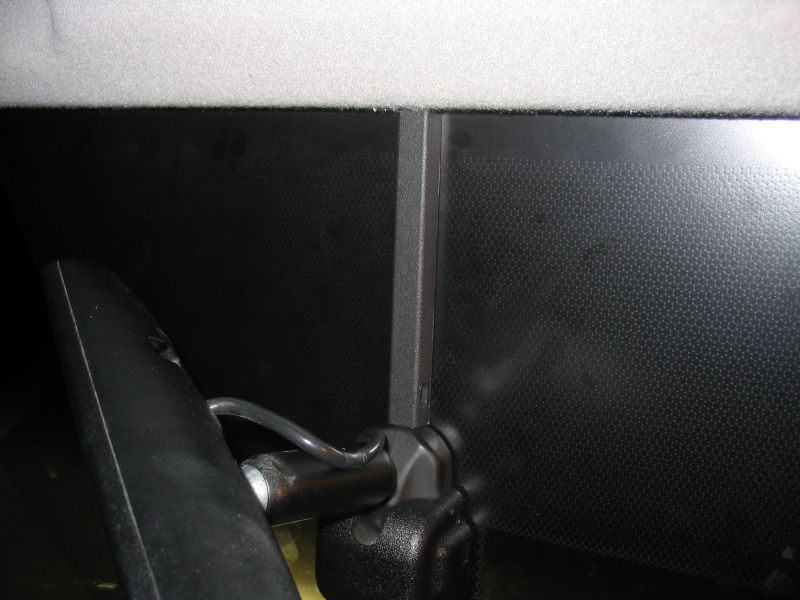
Here is the cable shroud fit snugly against the windshield between the mirror and the ceiling upholstery.

Next up was to figure out the power wiring in the sunroof. I referred to the mechanic’s wiring guide. Here is the pinout, looking into the cable connector.

- cab light power
- ignition power (+12V “accessory”)
- cab light power return
- motor power
- motor power return
- switch 1
- switch 2
- chassis ground
I used the +12V accessory power, which is only on when the key is in the “on” position.
The ground point I used was a bulkhead bolt, giving a really good ground and easy connection point.

Then I spliced power into the ignition power wire. I should have used a T-splice, but I didn’t have any. A wire nut would suffice.

Here is the new mirror assembly, cleanly mounted on the glass.

After some easy calibration of the mirror (had to drive in circles for a few seconds), the mirror works great!

References:
Full Project Gallery:
Leave a Reply